

Join us as we explore the fundamental components of a kayak, must-have equipment, and crucial safety measures every paddler should know.
Throughout this guide, look for the 🔰 Beginner and 🥇 Pro tags to quickly find information most relevant to your skill level. Remember, even experienced paddlers benefit from reviewing fundamentals and this guide has no fluff, no unnecessary jargon, just actionable advice that works on water, where it matters the most.
Understanding Kayak Anatomy
🔰 For Beginners: Getting to Know Your Vessel
Every kayak tells a story through its design. With key components showing how and where a kayak is designed to be used –
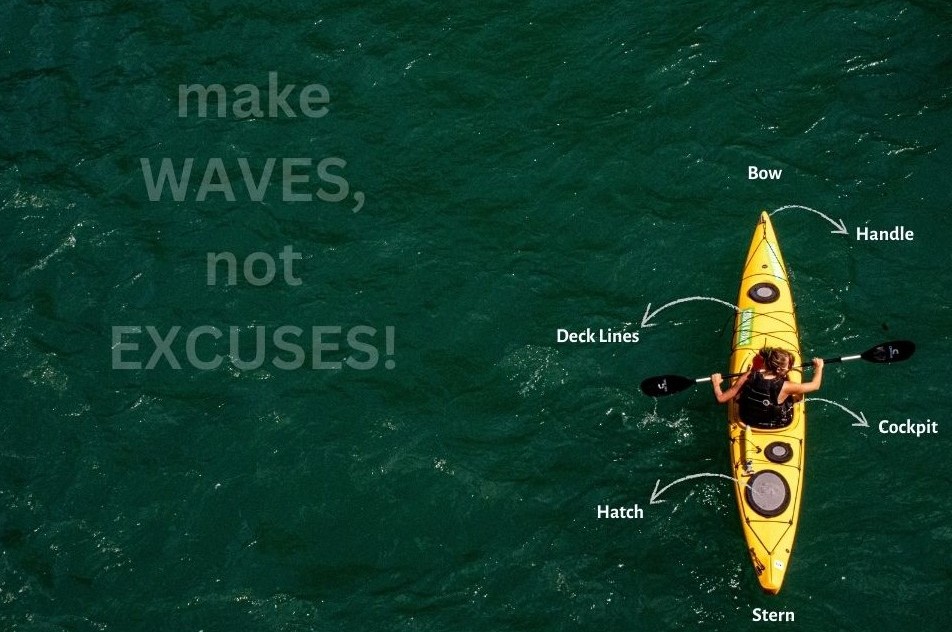
Deck: The top surface that stays above water. It’s your platform for securing gear and your interface with the kayak’s performance.
Hull: The underwater portion that determines how your boat moves. It’s a carefully engineered surface that dictates stability, speed, and manoeuvrability.
Keel: That central ridge running bow to stern isn’t just for show. A pronounced keel helps novices track straight, while minimal keels allow the quick turns seasoned whitewater paddlers need.
Cockpit: Your command center. Snugger cockpits connect you intimately with the kayak’s movements; larger ones sacrifice some control for easier entry and exit.
Hatch: Not just storage, these are your expedition enablers. Always test these seals in shallow water before trusting them with electronics or camping gear.
Deck Lines: They’re your handhold during rescues and valuable attachment points for essential gear.
Handles: Sturdy grips at the bow and stern that distribute weight evenly for transporting your kayak.
Rudder or Skeg: Your tracking assistants. A rudder actively steers with foot control, while a skeg simply drops down to reduce weathercocking in crosswinds.
Tip: Before your maiden voyage, spend 15 minutes in your kayak on dry land. Adjust everything until your legs are comfortably braced, your backrest supports without restricting, and your feet rest naturally on the rests.
🥇 For Pro Paddlers: Understanding Performance Design
For those chasing performance, the subtleties of design become crucial. The interplay between keel line, chine profile, and rocker is the difference between fighting your boat and having it respond like an extension of your body. Hard chines create predictable edges for technical moves, soft chines offer forgiveness in rough conditions.
Lets breakdown some of the key characteristics of hulls.
Different Hull Types and What They Mean for Your Kayak
When it comes to kayaks, the shape of the hull plays a pivotal role in determining how they feel on the water. Learning to recognise these shapes helps you pick the right kayak for your needs and style of paddling.
1. Flat Hull
A flat-hulled kayak has a bottom surface that is visibly broad and level. When turned upside down, you will see a mostly flat expanse through the midsection.
- Primary Stability: Excellent. Flat hulls offer an immediate sense of steadiness, which is great for beginners and calm-water activities like gently cruising or fishing.
- Manoeuvrability: Responsive at lower speeds. They tend to turn easily, making them good for slow-moving rivers or small lakes.
- Speed and Tracking: May be slower than other designs and can wander more easily off course in choppy water.
2. Rounded Hull
A rounded hull has a continuous curve along the bottom. Turn a rounded-hull kayak upside down, and you will notice a smooth arch with no distinct edges.
- Secondary Stability: Strong once you start edging or leaning. Although they can feel ‘tippy’ at first, they become more stable as you tilt them in the water.
- Speed and Efficiency: Generally faster and more efficient over distance than flat hulls, making them popular for touring or sea kayaking.
- Manoeuvrability: Provide a good balance of agility and smooth tracking, though they can take practice to master due to the less pronounced initial stability.
3. V-Shaped Hull
A V-shaped hull comes to a noticeable ridge or point down the centre. When flipped over, you see a central peak forming the ‘V’.
- Tracking and Speed: Excellent. The central ridge reduces resistance, allowing the kayak to travel straight and efficiently, especially on open water.
- Stability: Initial stability can be moderate to low, but it typically transitions into stronger secondary stability as you lean.
- Suitability: A good option for those who want to cover long distances, such as sea kayakers and expedition paddlers.
4. Pontoon (Multi-Chine) Hull
A pontoon or multi-chine hull usually has multiple flat or slightly curved sections, creating distinct ‘edges’ or ‘chines’ along the bottom. If you flip the kayak, you can spot the different planes meeting at angular lines.
- Stability: Often provides high primary stability and decent secondary stability. The multiple planes help the boat remain balanced at various angles.
- Flexibility: Offers a compromise between flat and rounded hulls, making it suitable for recreational paddling on calmer waterways.
- Speed: Usually slower than V-shaped or fully rounded designs.
5. Hard vs. Soft Chines
Although not strictly a hull ‘type’, the shape and definition of your kayak’s chines (the transition points or edges where the bottom meets the sides) play a role in performance:
- Hard Chines: Have well-defined edges. They offer crisp handling and can make edging (tilting the kayak to turn) more pronounced. However, they may feel less forgiving if you lean too far.
- Soft Chines: Feature smoother, rounded transitions. They provide a more seamless feel when edging, potentially offering more comfortable secondary stability but less aggressive turning.
6. Rocker: The Curve from Bow to Stern
Alongside the hull’s cross-section, rocker is crucial. If you lay a kayak flat on the ground, a hull with pronounced rocker will have a noticeable upward curve at the bow and stern. A heavily rockered hull pivots more easily and is popular for white-water or surf zones where tight manoeuvres are needed. A kayak with minimal rocker tracks straighter and is often used for covering distances on lakes or the sea.
Identifying Hull Types in the Shop or on the Shore
- Flip It Over: Examine the bottom. A flat, level midsection suggests a flat hull; clear edges or ridges often indicate hard chines or a V-shape.
- Check the Profile: From bow to stern, see how much curve (rocker) there is. A steep upward curve front and back suggests easier turning, while a flatter profile favours straight tracking.
- Feel the Sides: Run your hands along the sides to sense any abrupt edges (hard chines) or a smooth, continuous curve (soft chines).
By paying attention to these hull features, you will have a clearer idea of how a kayak is likely to perform. For beginners, prioritising stability and ease of handling can make all the difference in building confidence. More experienced paddlers might lean towards designs that enhance speed or advanced manoeuvring. Ultimately, understanding these fundamentals ensures you choose a kayak that not only matches your current skill level but also supports your progress on the water.
Even your bulkheads serve dual purposes, they’re not just creating dry storage compartments but providing critical flotation if you capsize and crucial structural rigidity across the hull.
Tip: Master your kayak’s edge control by practicing progressively steeper leaned turns in calm conditions. Find the sweet spot where your boat carves most efficiently, then memorize that feeling, it’s your performance baseline.
Types of Kayaks: Matching Vessel to Purpose
🔰 For Beginners: Your First Kayak
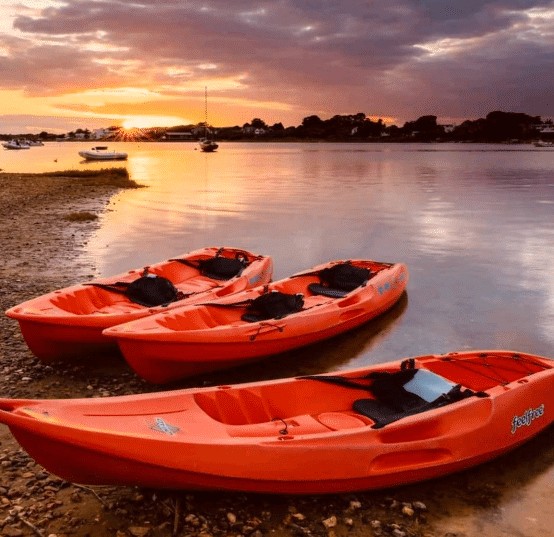
Your first kayak shouldn’t be your forever kayak, think of it as your learning platform. A Sit-on-Top Kayak (£250-£500) is the most user-friendly option. It’s self-draining and has an open deck, making it easy to re-enter if you fall off. If you prefer a closed cockpit, a Recreational Sit-Inside Kayak (9-12 feet, £300-£700) offers better protection from splashes and more efficient tracking.
Where to buy: Cotswold Outdoor, Alpine Trek
🥇 For Advanced Pro: Specialized Craft
Your advanced kayak should be your performance enabler:
If you’re looking for speed and long-distance paddling, Touring/Sea Kayaks (14-18 feet, £800-£2,500) are designed for efficiency. For whitewater adventures, Whitewater Kayaks (£700-£1,500) are shorter and more maneuverable. Those who need portability can opt for Folding or Inflatable Kayaks (£800-£2,000), which offer high performance in a compact package.
Where to buy: Pyranha, White Water The Canoe Centre
Essential Kayaking Equipment
🔰 For Beginners: Choose your Paddle

Your paddle is the tool that translates your energy into movement and so sizing matters. A paddle should match your height and kayak width. Beginners should opt for aluminium shafts with polypropylene blades (£30-£80). Yes, you’ll eventually want something lighter, but master your technique first. Symmetrical blades forgive imperfect technique. They’re ideal while you’re developing that muscle memory that will eventually become second nature.
🥇 For Pro Paddlers: Performance Optimization
Your paddle should disappear in your hands, becoming a seamless extension of your body. Most experienced paddlers settle somewhere between 30-60 degrees of feather angle. Pro paddlers will benefit from lightweight carbon fiber paddles (£200-£450) with adjustable feather angles. The 200-gram difference between aluminium and carbon might seem small until hour six of your journey.
Beginner or Pro, get your paddles here: Decathlon, Werner Paddles UK
Personal Flotation Device (PFD): Non-Negotiable Safety
Prioritize Type III PFDs designed specifically for paddle sports, essential for all kayakers. They’re engineered to allow the paddle movement paddlers need while providing crucial flotation. It’s better to regret wearing PFD than to regret not having one.
🔰 For Beginners: Finding Your First PFD
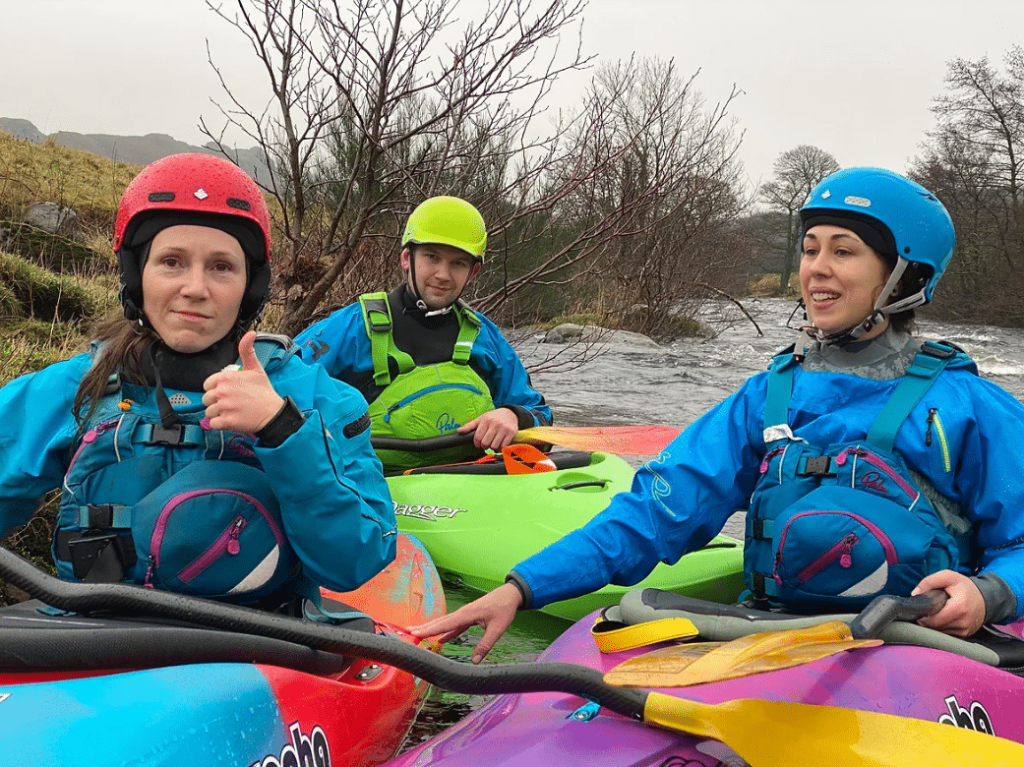
The basic here is that it needs to fit right, look for comfortable, high-visibility designs (£40-£90). Choose colours that pop, stand out against water and shoreline, potentially cutting rescue time in half.
🥇 For Pro Paddlers: Specialized Safety
Your PFD is your on-water utility belt. You can test flotation by kneeling on it in shallow water, if it compresses more than 50%, it’s time for replacement. Look for designs with hydration compatibility (£100-£250), quick-access rescue knife attachments, and multiple organized pockets for safety essentials.
Get your PFDs here: Palm Equipment, NRS Europe
Spray Skirt and Cockpit Water Management
🔰 For Beginners: Staying Dry
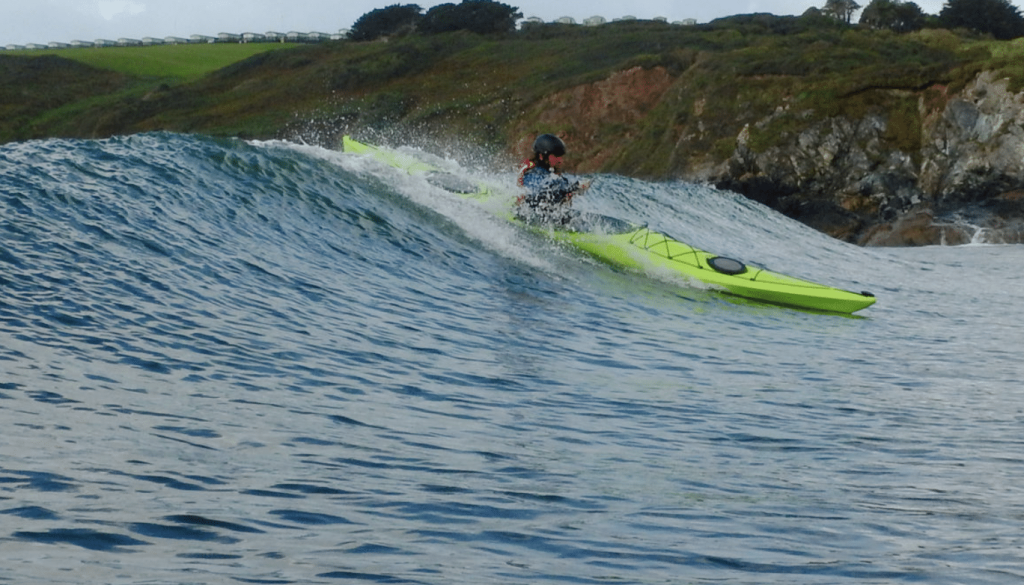
Water inside your kayak is weight in exactly the wrong place. Nylon spray skirt (£20-£50) is ideal for beginners who want basic splash protection.For water management you can start with a simple hand pump rated at 20-30 liters per minute. Secure it under your deck bungees where you can reach it without contorting. A synthetic cellulose sponge about the size of a paperback book is perfect for soaking up those last bits of water your pump can’t reach.
🥇 For Pro Paddlers: Technical Performance
In challenging conditions, your spray skirt becomes critical safety equipment. The perfect seal comes from proper sizing and tensioning systems. For rolling and surfing in dynamic water, invest in a full neoprene skirt (£80-£150) with reinforced grab loop, bungee rim tensioning, and implosion-resistant design.
Efficiency in water management can be the difference between continuing your journey and an emergency evacuation. Invest in a high-capacity pump (40+ liters per minute) with ergonomic handle design. The extra capacity is to reduce fatigue during extended pumping sessions. For expedition paddling, consider compact electric bilge pumps that can clear 15-20 gallons per minute.
Let’s get you skirts and bailout tools: Reed Chillcheater, Kayaks and Paddles
Weather-Appropriate Clothing: Dressing for Survival
🔰 For Beginners: Basic Comfort and Safety
In paddle sports, your clothing is survival equipment, no space for fashion here unfortunately. Follow the 120° rule. Add water temperature and air temperature in Fahrenheit. If the total is below 120°F (49°C), you need thermal protection regardless of how warm the sunshine feels on your face.
🥇 For Pro Paddlers: Environmental Mastery
Strategic layering is your climate control system in changing conditions. Summer paddling might require just UV protection and splash defense, while winter demands a systematic approach to maintaining core temperature despite immersion risk. Whitewater paddling generates more body heat than flatwater touring, adjust your layers accordingly.
For your layers, check: Palm Equipment, Decathlon
Safety Equipment: Preparing for the Unexpected
🔰 For Beginners: Starting Safe
Safety isn’t where you economize or take shortcuts.
Helmet: Even on flat water, a helmet is advisable near rocky shorelines or areas with low-hanging obstacles. Look for CE-certified kayaking-specific helmets with effective drainage.
Where to Buy: Decathlon, Palm Equipment
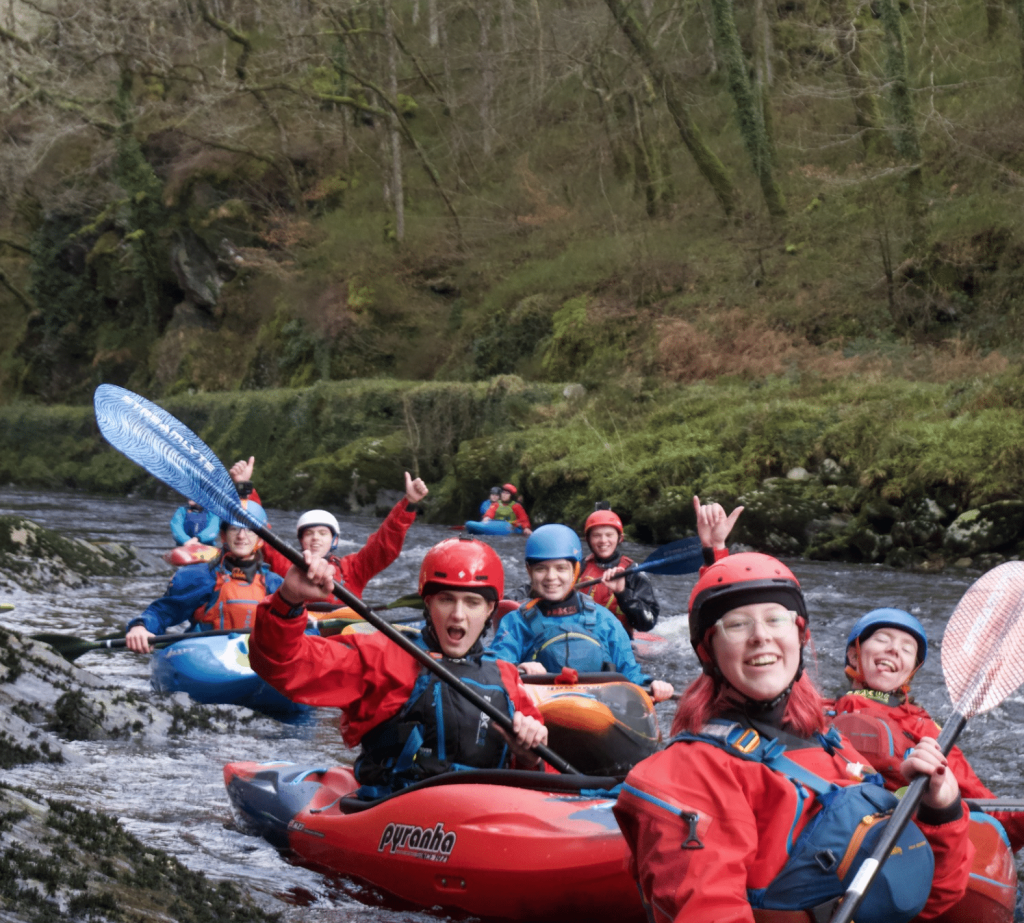
First Aid Fundamentals: Start with a waterproof container holding essentials: waterproof bandages in various sizes, antiseptic wipes, blister treatment, pain relievers, and any personal medications.
Where to Buy: Go Outdoors, NRS Europe
Signal Essentials: A marine whistle attached to your PFD is mandatory. Learn the universal distress signal: three clear blasts, pause, repeat. Test its sound carrying capacity during your early paddling sessions.
Where to Buy: Blacks, Cotswold Outdoor
Tip: Create a laminated safety equipment checklist attached to your paddle bag. Physically check off each item before launching until the process becomes second nature.
🥇 For Pro Paddlers: Comprehensive Protection
For advanced paddlers the rules of safety don’t change, just upgrade. Your safety gear should evolve with the challenges you tackle.
Match your head protection to your paddling environment, whitewater helmets provide extended coverage for impacts from multiple angles, while lower-profile designs reduce fatigue during touring, check: NRS Europe, Peak UK
Develop a customized medical kit reflecting your environment’s specific risks, check: Lifesystems, Cotswold Outdoor
Build a multi-layered signaling system including whistle, waterproof strobe, signal mirror, and marine VHF radio for coastal paddling. Check: Marine Super Store, Silva UK
Navigation Tools: Finding Your Way
🔰 For Beginners: Basic Orientation

Getting lost turns fun into an emergency surprisingly quickly. Store paper maps in heavy-duty waterproof cases with secure lanyard attachments. Mark your planned route and highlight potential exit points at regular intervals. Learn to take and follow basic bearings with a floating compass.
Practice the fundamental skill of identifying prominent landmarks and relating them to your position on the map. Waterproof cases allow smartphones to serve as backup navigation devices. Download offline maps before departure, cellular coverage disappears quickly on many waterways.
Tip: Practice a simple out-and-back route using only map and compass. Identify three prominent landmarks before you begin and use them to maintain orientation throughout your journey.
🥇 For Pro Paddlers: Precision Navigation
Advanced navigation is about integration of multiple information sources.
Experienced kayakers should integrate multiple navigation tools for accuracy in low visibility, strong currents, or open-water crossings. Learn to interpret tide charts, current flow data, and weather forecasts to optimize paddling conditions. You can access tide charts for free at Admiralty EasyTide. A waterproof GPS (£150-£500) unit with marine charts provides real-time position tracking in foggy or offshore conditions, you can buy one at Marine Super Store. For sea kayaking, paper nautical charts are a reliable backup to electronic devices. Learn to read depth contours and restricted zones, check UK Hydrographic Office
Communication Devices, Stay Connected
🔰 For Beginners: Basic Communication
Communication is a critical safety component. Double-protect your mobile phone in a waterproof case inside a dry bag. Test making calls while on the water in various positions before relying on this system in an emergency. Establish clear check-in procedures with someone onshore who understands kayaking. Define specific contact times and explicit actions they should take if you miss a check-in. Program local coast guard, marine patrol, ranger stations, and emergency services directly into your phone. In an emergency, direct contact saves precious minutes compared to routing through general emergency numbers.
Tip: Create a simple float plan template that includes launch location, intended route with time estimates, expected return time, and emergency contacts. Share this with a reliable person before each paddle.
🥇 For Pro Paddlers: Comprehensive Systems
Reliable communication requires redundant systems and proper protocols. Obtain your VHF radio license and master proper radio protocols. Program in local emergency channels and practice making clear, concise transmissions that convey critical information efficiently.
For remote paddling, consider a Personal Locator Beacon (PLB) or satellite messenger. These devices transmit your precise location to emergency services via satellite when cellular and VHF coverage are unavailable. For larger groups, establish clear hand signals and whistle codes for on-water communication when verbal instructions are difficult to hear over wind or water noise.
For your communication devices check: ICOM UK, Force 4 Chandlery, ACR Electronics
Tip: Conduct a full communication drill during a group paddle. Simulate an emergency and test your ability to effectively communicate both within your group and with potential rescue services under realistic conditions.
Your Journey on the Water
Kayaking is a lifelong journey of discovery. Each paddle stroke builds physical skill, environmental awareness, and self-knowledge. Safety in paddle sports is the foundation that makes all enjoyment possible.
The satisfaction of kayaking comes not just from the destinations you reach, but from your growing mastery of both your craft and yourself. The challenges you overcome and the moments of perfect harmony between paddler, boat, and water create memories that last long after your gear has dried.
The water is calling, answer it with knowledge, preparation, and the respect it deserves.
——————————————————————————————————–
This guide follows recommendations from the Royal National Lifeboat Institution (RNLI), and the Maritime and Coastguard Agency, trusted authorities on water safety in the UK.